Sunday, January 25, 2015

Butterfly Wine Glasses

Well I finally tried my hand at glass etching and this is the result. There's a bit of a learning curve with this stuff but I think they turned out pretty good for my first time!

My friend loves butterflies and a good bottle of wine, so I bought some glasses and made a vinyl stencil with a butterfly that I found in the Silhouette online store.

I wanted the butterfly to be further down the glass but it was so curved I couldn't get the stencil on without wrinkles... Lesson learned. I still am very pleased with the way they turned out.


I used a brand called Armour Etch and it was super easy to use. I have a few other items that I would like to etch now that I know I can do it. Let the fun begin!!!!


My next post will be my first attempt working with a larger piece of vinyl. See you then.

Tuesday, January 13, 2015

On the Naughty List - A Bag Full of Coal

Ok this is the last Christmas post for this part of the year.

I saw this cute 3D Santa Bag in the Silhouette store by Jamie Cripps and knew what I wanted to do with it. I had picked up some chocolate coal the week before so when I saw it, I knew it was perfect.

I added some ribbon from my stash and the sentiment is from Jaded Blossom's V is for Villain. 

Monday, January 12, 2015

A Few Christmas Treats

Just 2 more Christmas posts before I switch to the rest of the upcoming year.

I made these quick and easy gifts to go in the bag with the rest of a gift for a friend.

Since my friend likes to paint her toes all the time I used the Mistletoes Topper by Jamie Cripps found in the Silhouette store to make this package. I used the Jaded Blossom Scallop Slider and Topper die for my base then added some Wink of Stella and some rhinestones.


For this second treat I made some homemade caramel popcorn and put it in a cello bag from Bulk Barn. Next I used Lori Whitlock's Popcorn Box to place my bag of yumminess in. The sentiment is from the Jaded Blossom Freshly Baked stamp set and the moose is Merry Moose from Our Craft Lounge .


Last little gift is a jar of Olives, my friend LOVES olives. I had the perfect sentiment for this gift. I used the Jaded Blossom Olive You stamp set, stamped in Memento Bamboo Leaves and colored in with Copics.. perfect! I'm sure that I will use this stamp set over and over again.

I think she will love these little quick and easy treats, just as much as I enjoyed making them for her. 

Monday, January 5, 2015

Birthday Wishes!!

Here's a quick card that I made for a friends birthday recently.

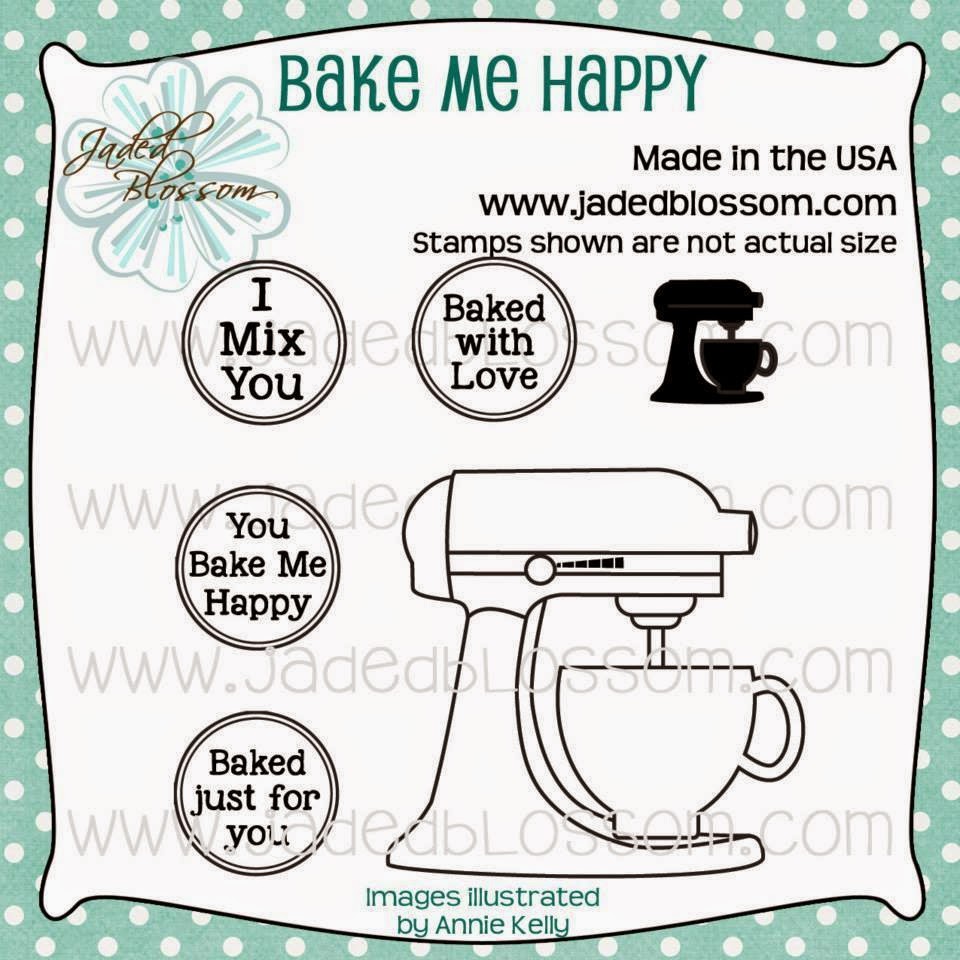
I used the Jaded Blossom November freebie Bake Me Happy Stamp set for the mixer and my paper. As you can see I got a little carried away stamping the mini mixer for my paper..lol... I was having too much fun.

 The sentiments are from the Jaded Blossom Baked With Love set.


Friday, January 2, 2015

Christmas Hand Sanitizer Holders

Hello everybody, hope everyone had a great New Years Eve and beginning to the new year.

Just wanted to share a few more Christmas projects over the next few days that have finally arrived at their destination.

I just love this Hand Sanitizer Holder by Lori Whitlock the combinations are endless.

For the first one I used Miss Kate's Ho Ho Ho file from the Silhouette online store. The ribbon and paper are from my stash and I added Wink of Stella around the black and on Santa's sack.


For this one I used the Echo Park Ornament also purchased at the Silhouette store. It's hard to tell but I used double sided tape and Glitter Ritz in white to match my paper.


Have a great day and keep crafting!

Saturday, December 27, 2014

Midnight Kisses

Greetings all, hoping everyone had a very Merry Christmas filled with family, friends, good food and all the trimmings. I was so thrilled to find out that I was one of the lucky ladies chosen to be a guest designer for the day on the Jaded Blossom blog.  A big THANK you to Michelle and Candace for the opportunity.

Since my day is after Christmas I chose to make my projects for New Years. I can't believe that we are going into 2015!!!!! So much has happened this year, time has just slipped away and the new year is upon us! I work at the hospital and will be working all the holidays including New Years Eve. So I decided to make a few fun treats for everyone at work.

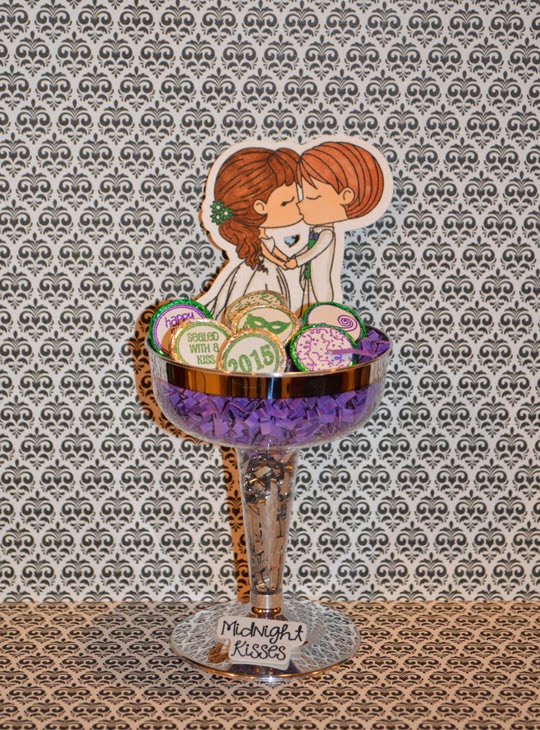
I started by making these Midnight Kisses. I went to the dollar store and bought some Champagne glasses and filled them with silver and purple paper shred. Using part of the November release,  I then embossed a bunch of kisses with the Happy New Year, Happy Hour Candies and the Valentine Candies stamp sets.


Then using my Cameo I cut out the shadow layer for the couple on The Perfect Match stamp set. Next I attached them to a pick and placed them in the glass with the kisses. The sentiment is from the Happy New Year set and it's a perfect match for my couple.


Then for some fun, I used the gusset bags and filled them with beads, some more kisses and a noise maker. For the topper I used the Scallop Slider and Topper Die and made my pattern paper by embossing the Holiday Treat Tags.

Next I cut out the shadow layer for the mask from the Happy New Year set, colored it, gave them a Wink of Stella, some Stickles and popped it on top.


I used the Happy New Year stamp set for the sentiment on the insert for the bag.


There are endless ideas using Jaded Blossom products, I love being able to see everyone's crafty take on all the products and of course I love getting my happy mail!!!!!

Merry Christmas, Happy New Year and cheers to finding lots of time to craft in the upcoming year!

Tuesday, December 16, 2014

Santa's Kitties

At Christmas time I like to make little favor boxes to give as gifts to my coworkers. I have a few friends that LOVE their cats, so I thought it would be cute to make a cat shaped box for a few of them.

Using the Cat Bag file from Studio Ilustrado and my Cameo I cut out the cat in different colors. Then using Silhouette Double- sided sheets adhered to cardstock I cut out all the pieces that would be furry. Peeling off the backing and adding  some Martha Stewart Flocking powder in Swan and Pewter to make the soft fur.

Since my cats are suppose to be Christmas Kitties, they needed some Christmas bling. I cut out some of the Christmas Photo Props from Silhouette.


For the first kitty  I cut out the Santa hat, added some Wink of Stella to the brim, a pompom and embossed the hat with the corner of the Peachy Keen Cat Background stamp in white. What kitty doesn't have a bell, so I threaded a tiny jingle bell onto some twine and tied it around my kitty.


For the second one I choose the Elf Hat, I inked around the edges and added some Wink of Stella to the bell then cut out the scarf. I tucked a mouse into his hat that I stamped and fussy cut out from the same Peachy Keen Cat Background stamp.


I wanted to add some tissue paper inside of my cat boxes so I stamped the Cat Background stamp onto some white tissue paper and made my own designer tissue. Love, love how it turned out!


I think they will love getting these Christmas Kitties and I had so much fun making them.

I will be entering this into the Silhouette Challenge #20 Anything Goes over at Silhouette Challenges.

Sunday, December 14, 2014

All Day Baking For You!! Not!!

Today I combined three of my favorite companies Pretty Paper Pretty Ribbons, Jaded Blossom and Peachy Keen to make my entry in the Christmas Challenge over at Pretty Paper Pretty Ribbons.

I started by cutting out the Oval Window Treat Bag in some festive cardstock. It is easy to assemble and can be used for any number of different projects. I added some Chips Ahoy Holiday edition cookies to mine.


Next I cut one of the Elves from the Silly Little Elf Girl file from PPPR. I omitted a few cuts so I could stamp her face with the Peachy Keen In The Garden Face assortment and to replace the stars on her skirt with some star rhinestones.

I embossed the candy cane in red from the Jaded Blossom Freshly Baked for her ornament.


The sentiment is from the Jaded Blossom's Baked with Love stamp set and is embossed on the baking tray from the Jaded Blossom Baking Dies.

I love how this turned out! There are so many possibilities that I could spend everyday for the next 10 years and still never get all the projects I would like to do... but I can try :)

Saturday, December 13, 2014

Hand Sanitizer Holder

The tree is up and twinkling away, stockings are hung and the smell of cinnamon is in the air ... I love this time of the year! So many things to do but I managed to find some time to squeeze in some crafting.

I bought a bunch of the Bath and Body Works Sanitizing Hand Gel ... loving all the yummy smells. Using my Silhouette and  Lori Whitlock's Hand Sanitizer Holder file 69516 I cut out this super cute gift.

The paper is from Recollections and the ribbon is American Craft


Next I cut out the Miss Kate Cuttables Snow Globe for the front. I added some Wink of Stella Clear, Gelly Roll White and a tiny bit of Christmas Red Stickles for Rudolph's nose.


The sentiment is from Jaded Blossom's Merry and Bright stamp set.


Thanks for stopping and I hope everyone has found some time to craft today :)

Thursday, November 27, 2014

Staff Christmas Party

The other night we had our staff Christmas party and needless to say I had a ton of fun. We all had to bring a small homemade gift, so this is what I whipped up for the party.

I started by making some candy treats... I work at the hospital and had this super cute stamp by CC Designs called Nurse Lucy and knew I wanted to use it.

I started by stamping Lucy out and coloring her with my Copics. It's hard to tell in the picture but I used my Wink of Stella pen on the needle and the pill and then fussy cut her out.


The sentiment is from the Jaded Blossom V is for Villain stamp set and I used their 3x4 clear bags for my candy.

I made the topper from the Pretty Paper Pretty Ribbons A2 Card Bases and just sized it to fit the 3x4 bags.

The paper is from the newest Recollections Christmas paper pack and inked in Fired Brick and Pine Needles from Tim Holtz.


I used the Merry and Bright as well as the Christmas Candies set for my kisses and filled the bags.

For the second one, I used a print and cut tag that I made last year using the Pretty Paper Pretty Ribbons Santa's Helpers file and the sentiment is from the Jaded Blossom Merry and Bright set.


Last year I bought a bunch of the glass ornaments form Michaels, so I used Mop and Glo and some Glitter Ritz micro fine glitter in Royal Blue to make this snowflake ornament.


The snowflake is cut out of Silhouette Double-sided adhesive sheets and after applying it to the ornament I used Glitter Ritz Warm Highlight glitter. It is from the Pretty Paper Pretty Ribbons Winter Wonderland file.


I put them into a small plastic bucket I found at the Dollar store and there you have it, a small handmade treat!

We all had a great time at the party and I loved seeing everyone's crafty side at work.

Hope everyone enjoys the upcoming holidays and stays safe.

Tuesday, November 25, 2014

Fall Straws

Well I'm finally done rearranging my craft area, took awhile but was totally worth it. I'm very pleased with the way it looks now. Today I wanted to share the cute straws I made for the Pretty Paper Pretty Ribbons Fall Challenge. I adore Lisa's cutting files, they are so fun to create with.

Last week I was in Target and found these Fall paper straws in the clearance and of course I brought them home and hung them on the peg board of crafty finds :) 

I used two of the Friday Freebies to make my straws... ( LOVE the Friday Freebies!! ) I cut all three leaves from the Leafy Faces file and made a shadow layer for each. Then using Tim Holtz Spiced Marmalade, Fired Brick and Peeled Paint inked all the edges of the leaves.

Finally I added faces from Peachy Keen's In The Garden and Cornies Faces Assortments.


Then I needed something to hold all my cute Fall straws. I cut out the Pilgrim Hat Treat Bag omitting the handle...perfect for my straws.


Happy Thanksgiving to our neighbors in the USA in the coming days. Hope everyone if having a great afternoon and has found some time to craft. Make sure to link your project to the Fall themed challenge at PPPR.

Saturday, November 8, 2014

Little Monsters

From a month with no posts to 2 posts in one day.. lol but I just wanted to share the cute little tags I made for a special fun treat.

Almost a year ago a good friend gave birth to the most handsome twin boys. Well this year was their first Halloween, so I had to get them something. They got dressed up as these cute little blue monsters so I decided to make tags to match their little outfits.

I used the Cute Monster file from Michelle Rene and I just deleted some of the unwanted parts. I used Martha Stewart Flocking Powder in Fennel and gave them fury tummies. I added some googly eyes and some popdots to the mouth.


Originally my friend wanted to get photos of the boys in pumpkins but unfortunately it didn't happen. So I decided to put them in pumpkins for my tags using the Pumpkin Owl file form PPBN Designs. Made my pumpkins/monsters a shadow layer and added some ribbon.

On the back I cut out Spellbinders Pumpkin Circles for my sentiment spot. Then combining the Jaded Blossom Monster Mash stamp set and the Peachy Keen Frankly set to make my sentiment.

Here is a link to the original pictures before I spookified them!!